When the power goes out, life grinds to a halt. The refrigerator starts warming, lights fail, and essential medical equipment can lose vital energy. For many homeowners, a portable generator becomes a beacon of hope, offering a temporary lifeline to keep crucial appliances running. But the path from generator to powered home isn't as simple as plugging it into an outdoor outlet. Done incorrectly, connecting a portable generator to your home can be incredibly dangerous, risking electrocution, fire, and damage to your electrical system.
This guide will walk you through the safest, most reliable methods for connecting a portable generator to your home, focusing on the recommended transfer switch method, while also exploring a common alternative and critical safety protocols. Our goal is to empower you with the knowledge to restore power confidently and securely.
At a Glance: Key Takeaways for Generator Connection
- NEVER Backfeed: Plugging a generator directly into a wall outlet (backfeeding) is illegal, extremely dangerous, and can be fatal to utility workers.
- Transfer Switch is Best: A transfer switch is the safest, most recommended method, allowing you to switch between utility and generator power seamlessly and protect your home's electrical system.
- Interlock Kits are an Alternative: A less expensive option, interlock kits prevent backfeeding but require careful, compliant installation and are not legal everywhere.
- Professional Installation is Key: Both transfer switches and interlock kits should ideally be installed by a licensed electrician to ensure safety and adherence to local codes.
- Ventilation is Paramount: Always operate your generator outdoors, at least 10 feet from your home, to prevent deadly carbon monoxide poisoning.
- Size Matters: Match your generator's capacity to your essential power needs to avoid overloading and ensure efficient operation.
The Golden Rule: Never, Ever Backfeed!
Before we delve into the correct ways to connect a generator, let's be unequivocally clear about the most dangerous method: backfeeding. Backfeeding is when you plug your generator directly into a wall outlet in your home, intending to power the house through its internal wiring.
Why is it so dangerous?
When you backfeed, you create an electrical current that travels backward through your home's wiring, out through your meter, and into the utility grid. This turns the utility lines, which technicians might be working on, into live wires. Imagine a utility worker, thinking the line is dead, suddenly touching a wire energized by your generator. The result can be fatal electrocution. Backfeeding also bypasses your home's main circuit breakers, leaving your electrical system vulnerable to surges, potentially causing fires and severe damage to your appliances and wiring.
The takeaway: Backfeeding is illegal, damages your home, and can kill. Do not do it.
Understanding Your Options: Powering Up During an Outage
When the lights go out, you have two primary approaches to using a portable generator:
- Connecting Appliances Directly via Extension Cords: This is the simplest method. You run heavy-duty, outdoor-rated extension cords directly from your generator to individual appliances (like a refrigerator, a few lamps, or a phone charger). While this avoids connecting to your home's electrical system, it's cumbersome. You can't power your overhead lights, wall outlets, or hardwired appliances like furnaces or well pumps. It's a temporary, very limited solution.
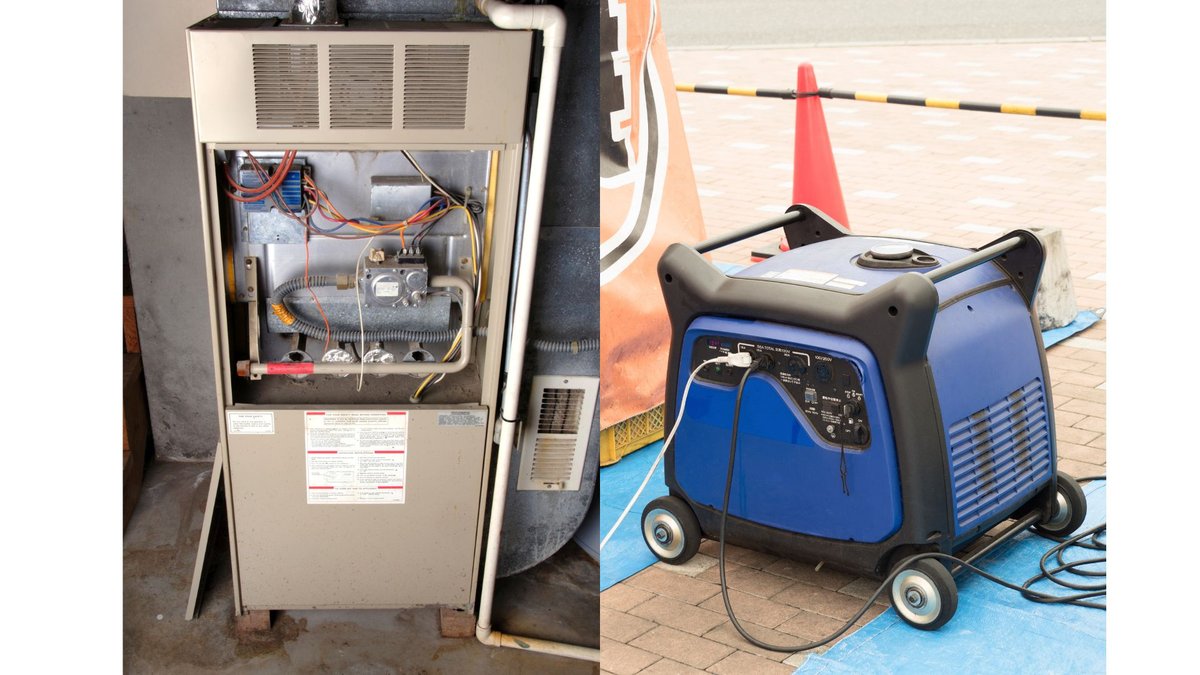
- Connecting to Your Home's Electrical Grid: This is where the real versatility lies. By integrating your generator into your home's wiring, you can power specific circuits, bringing light to entire rooms, running multiple wall outlets, and energizing critical hardwired systems. This approach requires specialized equipment to do safely and legally, primarily a transfer switch or, in some cases, an interlock kit.
The Safest Path: A Transfer Switch
The gold standard for safely and efficiently connecting a portable generator to your home is a transfer switch. This device acts as an intelligent gatekeeper for your home's electricity, preventing dangerous situations and simplifying power management during an outage.
What Exactly is a Transfer Switch?
A transfer switch is an electrical control device typically installed next to your home's main circuit breaker box. Its core function is to allow you to safely switch your home's electrical supply between two sources: the utility power grid and your portable generator. Think of it as a dedicated bypass for your generator's power.
Types of Transfer Switches:
- Manual Transfer Switches: These are the most common type for portable generators. They work like a mini breaker box. When the power goes out, you manually flip a main switch to disconnect from utility power, then manually activate the generator circuit, and then selectively turn on individual circuits (like kitchen, living room lights, etc.) that you want to power with the generator. This gives you direct control over which circuits draw power, helping you manage your generator's wattage.
- Universal (or Automatic) Transfer Switches: While more common for whole-home standby generators, some advanced universal manual switches exist for portable units. These can automate parts of the process. They might prioritize outlets or appliances, automatically manage power draw, and some can even detect a utility power failure, signal your generator to start (if it has auto-start capabilities), switch to generator power, and then seamlessly return to grid power when it's restored. Some even include a battery backup for the switch itself. For portable generators, however, a fully automatic setup is rare; most "universal" options still require manual generator startup but automate the power switching once the generator is running.
Why a Transfer Switch is Your Best Bet
- Absolute Safety: This is the paramount advantage. A transfer switch provides a complete, physical separation between your generator and the utility grid. It's impossible for generator power to backfeed onto utility lines, protecting utility workers and preventing damage to your home.
- Convenience: Once installed, operating a generator with a transfer switch is straightforward. No more running a tangle of extension cords through windows and doors.
- Whole-House Potential (for selected circuits): You can power hardwired appliances like furnaces, water heaters (if sized appropriately), and well pumps, as well as multiple light circuits and wall outlets throughout your home, not just direct-plugged items.
- Load Management: Manual transfer switches allow you to selectively power circuits. This is crucial for portable generators, which have limited wattage. You can prioritize essentials (refrigerator, furnace, a few lights) and avoid overloading the generator.
- Code Compliance: Transfer switches are the approved and often required method by electrical codes for connecting a generator to your home's electrical system.
Planning Your Generator Connection: Before You Buy or Install
Before you even think about purchasing a transfer switch or starting installation, some critical planning steps are necessary to ensure safety, efficiency, and compliance.
Calculate Your Power Needs: What Absolutely Needs to Run?
A portable generator has finite power output. You can't run your entire house, especially large 240-volt appliances like central air conditioning, electric stoves, or clothes dryers. The first step is to list every essential appliance and system you want to power during an outage and estimate their wattage.
- Running Watts vs. Starting Watts: Appliances with motors (refrigerators, freezers, furnaces, well pumps) have a higher "starting wattage" (surge watts) that they briefly draw when they first kick on, often 2-3 times their "running wattage." Your generator must be able to handle both.
- Example Wattage Estimates (approximate, check your appliance labels):
- Refrigerator: 600-800W running, 1200-1500W starting.
- Microwave: 1000-1500W.
- Incandescent Lights (100W bulb): 100W per bulb.
- CFL/LED Lights: Much lower, ~10-25W per fixture/circuit.
- Furnace (Gas, 1/3 HP motor): 600-800W running, 1500-2000W starting.
- Sump Pump (1/2 HP): 800-1000W running, 1500-2000W starting.
- Well Pump: Varies widely, often 1000-2000W running, 2000-4000W starting (might require a larger generator).
- Television (LED): 50-200W.
- Laptop/Phone Charger: 20-100W.
Calculation Tip: Add up the running watts of all devices you want to operate simultaneously. Then, identify the single largest starting wattage among your essential motor-driven appliances. Add that largest starting wattage to the running watts of all other devices that would be on at the same time. This total will give you a good estimate of the minimum running watts your generator needs.
Navigating Local Regulations & Permits
Before any installation, always contact your local authorities. This includes your Department of Labor and Industries, Planning Department, or directly your power company. They can inform you about:
- Required Permits: Most electrical work, especially involving permanent changes to your home's wiring, requires a permit.
- Local Codes and Regulations: Specific wiring systems, types of equipment, and installation methods may be mandated.
- Inspection Requirements: Your work will likely need to be inspected by a certified electrical inspector.
Ignoring these steps can lead to fines, unsafe installations, and issues with insurance.
Choosing the Right Generator
Once you know your power needs, you can select a portable generator that meets those requirements. Consider the total wattage needed, fuel type (gasoline, propane, dual-fuel), runtime, noise level, and features like electric start. For help navigating the options, you can find the best portable generator that fits your specific needs and budget. Remember, generator power ratings are often in KVA (Kilovolt-Amperes), but for simplicity, most people refer to kilowatt (kW) or watt (W) output.
Installing a Transfer Switch: A Job for the Pros (Mostly)
Installing a transfer switch involves working directly with your home's main electrical panel. While technically possible for experienced homeowners with a strong understanding of electrical systems, professional installation by a licensed electrician is highly recommended for safety, code compliance, and peace of mind.
From Breaker Box to Inlet Box
Here’s a simplified overview of the installation process for a manual transfer switch and inlet box:
- Site Assessment: An electrician will determine the best location for the transfer switch (usually near your main electrical panel) and the generator inlet box (on an exterior wall, close enough for a safe generator setup, but away from windows/doors).
- Transfer Switch Installation:
- The electrician will identify the circuits you want to power with the generator (based on your earlier calculations).
- The corresponding circuit breakers in your main panel are then wired into the transfer switch.
- The transfer switch itself is mounted and hardwired into your home's electrical system. It contains its own set of breakers for the selected circuits.
- Inlet Box Hookup:
- An exterior generator inlet box is installed on your home's exterior wall. This box houses a recessed male connector, designed specifically for a generator cord.
- Heavy-gauge electrical wiring runs from this inlet box through your walls to the transfer switch, completing the circuit. This ensures a safe, weatherproof connection point for your generator.
- Labeling: All new components will be clearly labeled.
- Testing: The electrician will thoroughly test the entire setup to ensure it functions correctly and safely.
Crucial Safety Note: This process involves disconnecting power from your main breaker panel and working with high-voltage electricity. Any mistake can lead to serious injury, fire, or damage to your home. This is why professional installation is not just a recommendation but often a requirement by local codes.
The Critical Role of Inspection
Once the transfer switch and inlet box are installed, it's common practice, and often legally required, to have the setup professionally inspected by your local electrical authority. This ensures that the installation meets all relevant electrical codes and safety standards. Passing inspection means your system is safe, legal, and ready for use.
Operating Your Generator with a Transfer Switch: Step-by-Step Power Restoration
With your transfer switch installed and inspected, you're ready to safely restore power during an outage.
1. Safety First: Generator Placement & Setup
- Location, Location, Location: This is paramount for safety. Place your portable generator at least 10 to 20 feet (3 to 6 meters) away from your home, away from any windows, doors, or vents. Carbon monoxide (CO) is an odorless, colorless, deadly gas produced by generators. Proper ventilation is non-negotiable.
- Level Surface: Ensure the generator sits on a dry, level surface to prevent tipping and ensure stable operation.
- Weather Protection: If it's raining or snowing, use an open-sided canopy, generator cover, or custom enclosure to protect the generator from moisture. Never operate it in a fully enclosed space.
- Fuel Check: Check the fuel level and oil level before starting.
- CO Detector: Install battery-operated carbon monoxide detectors in your home, especially near sleeping areas, and test them regularly.
2. Plug It In
- Use the specialized, heavy-duty generator cord (often a L14-30P or L5-30P male plug on one end, and a matching female receptacle on the other) that came with your transfer switch or was recommended by your electrician.
- Plug the generator cord into your generator's appropriate outlet.
- Plug the other end of the cord into your outdoor generator inlet box. Ensure a snug, secure connection.
3. Prepare the Transfer Switch
- Disconnect from Utility: On your transfer switch, locate the main utility power breaker. Flip this breaker to the "OFF" or "GENERATOR" position. This physically disconnects your home from the utility grid. This is a critical step to prevent backfeeding.
- Manual Breakers Off: If you have a manual transfer switch, it's good practice to turn off all individual circuit breakers within the transfer switch before starting the generator. This reduces the initial load when the generator first starts.
4. Start the Generator
- Follow your generator's specific starting instructions (e.g., open fuel valve, turn choke, pull cord or press start button).
- Let the generator run for approximately 5 minutes to warm up and stabilize its voltage and frequency. Never start or stop the generator with a heavy load already connected.
5. Bring Power Back to Your Home
- Once the generator is warmed up and running smoothly, go to your transfer switch.
- Flip the main transfer switch breaker to the "GENERATOR" position (if you haven't already).
- Begin flipping on the individual circuit breakers within the transfer switch, one by one. Start with the most critical circuits first (e.g., refrigerator, furnace).
- Manage Your Load: Monitor your generator's output. Do not turn on every circuit simultaneously. Turn on only what you truly need and avoid exceeding your generator's rated running wattage. If you hear the generator strain or the engine bog down, immediately turn off some circuits.
6. Returning to Utility Power
When utility power is restored:
- Turn Off Circuits: Go to your transfer switch and flip off the individual circuit breakers one by one.
- Disconnect from Generator: Flip the main transfer switch breaker from "GENERATOR" back to the "UTILITY" or "OFF" position. This disconnects the generator from your home's circuits.
- Shut Down Generator: Go to your generator and turn it off using its designated switch or key. Always turn off the generator and unplug the cord only after all loads have been disconnected.
- Store Generator: Once cooled, disconnect the generator cord from the inlet box and generator, and store your generator and cord properly.
- Restore Utility Power: Go to your main electrical panel and flip the main utility breaker back to the "ON" position. Then, go to your transfer switch and flip its main breaker back to "UTILITY." Finally, turn on your individual circuit breakers in your transfer switch as needed.
An Alternative: The Interlock Kit (With Caveats)
An interlock kit is another method for safely connecting a portable generator to your home's electrical panel, often presented as a more affordable and simpler-to-install alternative to a full transfer switch. However, it comes with important caveats regarding safety and legality.
What is an Interlock Kit?
An interlock kit is a mechanical sliding plate that is installed on your existing main service panel. It works by physically preventing two breakers from being "ON" at the same time: your main utility breaker and the dedicated circuit breaker for your generator. This physical barrier ensures that you cannot accidentally (or purposefully) have both utility power and generator power flowing into your home simultaneously, thus preventing backfeeding.
Installation Considerations
- Model Specific: You must purchase an interlock kit that is specifically designed for the make, model, and size of your existing electrical service panel. A mismatch can render it ineffective and unsafe.
- Dedicated Breaker: You'll need to install a new circuit breaker (typically a 220/240-volt breaker with the correct amperage for your generator's output) in your main panel. This breaker connects to an outdoor generator inlet box.
- Legality: Interlock kits are not legal in all areas. Before considering this option, check with your local electrical authority and power company to ensure it's approved in your jurisdiction. Some areas require a full transfer switch regardless.
- Professional Installation is Still Advised: While simpler than a full transfer switch, installing an interlock kit still involves working within your main electrical panel. Incorrect installation can create significant hazards. A licensed electrician is strongly advised for both installation and inspection.
How to Operate with an Interlock Kit
The operating procedure is similar to a transfer switch in its core principle of isolating power sources:
- Generator Setup: Place your generator at least 10-20 feet away from your home in a well-ventilated area.
- Plug In: Connect your generator's specialized cord to the generator and then to the outdoor generator inlet box.
- Crucial Interlock Step: Go to your main electrical panel. Using the interlock kit, you must slide the interlock plate to physically prevent your main utility breaker from being on. Then, flip your main utility breaker to the "OFF" position. This is the moment your home disconnects from the grid.
- Generator Breaker On: Once the main utility breaker is off and the interlock plate is engaged, you can then flip on the dedicated generator circuit breaker in your panel.
- Start Generator: Start your generator and allow it to warm up for 5 minutes.
- Power Circuits: Return to your main panel and selectively turn on the individual circuit breakers for the appliances and lights you want to power. Again, manage your load carefully.
- Return to Utility Power: To revert, turn off all individual circuit breakers in your panel. Turn off the generator's dedicated breaker. Shut down the generator. Unplug the generator cord. Then, slide the interlock plate back into position, allowing you to turn your main utility breaker back "ON" and restore grid power to your home.
Essential Safety Practices for Portable Generator Use
Regardless of your connection method, adhere to these fundamental safety guidelines:
- Carbon Monoxide (CO) Kills: Never operate a generator indoors, in a garage, carport, or near open windows. Always place it outdoors, at least 10-20 feet from your home, with the exhaust pointed away from living spaces. Install and regularly test CO detectors in your home.
- Proper Fuel Handling: Store fuel in approved containers, in a well-ventilated area, away from living spaces and ignition sources. Never refuel a hot or running generator. Allow it to cool down completely before adding fuel.
- Avoid Overloading: Do not exceed your generator's wattage capacity. Overloading can damage the generator and connected appliances, and create a fire hazard. Use an appropriate generator for your needs.
- Proper Cords: Use heavy-duty, outdoor-rated extension cords (12-gauge or heavier) that are long enough to reach appliances without stretching. Inspect cords for damage before each use.
- Keep It Dry: Generators produce electricity; water and electricity don't mix. Operate generators on a dry surface under an open-sided canopy during wet weather.
- Grounding: Ensure your generator is properly grounded according to the manufacturer's instructions to prevent electric shock.
- Maintenance: Perform regular maintenance as per the manufacturer's manual (oil changes, spark plug checks, air filter cleaning). A well-maintained generator is a safer, more reliable generator.
- Children and Pets: Keep children and pets away from the generator at all times. The hot engine, moving parts, and electrical output pose significant risks.
- Emergency Contact Information: Have contact information for your utility company and your electrician readily available.
Common Questions & Misconceptions About Generator Connections
Q: Can I just plug my generator into any outdoor outlet?
A: No, absolutely not. Plugging your generator into any outdoor (or indoor) wall outlet is backfeeding, which is illegal and extremely dangerous. It can send electricity back into the grid, endangering utility workers, and can cause damage or fire in your home.
Q: How far away should my generator be from my home?
A: Your generator should be at least 10 to 20 feet (3 to 6 meters) away from your home, positioned so its exhaust is directed away from any windows, doors, or vents. This is crucial to prevent carbon monoxide from entering your home.
Q: What size generator do I need for my home?
A: The size depends entirely on your specific power needs. You need to calculate the running watts and the largest starting watts of all the essential appliances you want to power simultaneously. Portable generators typically range from 2,000 to 10,000 watts, with larger units required for more extensive needs.
Q: Do I need a carbon monoxide detector if I run my generator outside?
A: Yes! Even with proper outdoor placement, carbon monoxide can drift into your home through open windows, doors, or vents. Battery-operated CO detectors should be installed on every level of your home, especially near sleeping areas, and tested regularly.
Q: Can I connect my portable generator to my washing machine or dryer outlet?
A: No, this is another form of backfeeding and is unsafe. These outlets are not designed for generator input and bypass the necessary safety measures of a transfer switch or interlock kit, creating the same risks as plugging into any other wall outlet.
Your Next Steps to Power Preparedness
Having a portable generator is an excellent step towards resilience during power outages. However, safe and effective connection is paramount.
- Assess Your Needs: Determine exactly which appliances and circuits you consider essential during an outage and calculate their wattage requirements.
- Consult Local Authorities: Before buying any equipment or starting any installation, contact your local Department of Labor and Industries, Planning Department, and power company to understand local codes, permits, and approved connection methods.
- Plan for Professional Installation: For a transfer switch or interlock kit, budget for and hire a licensed electrician. Their expertise ensures a safe, compliant, and reliable connection.
- Invest in Safety Gear: Always have a specialized generator cord, appropriate outdoor-rated extension cords, and functioning carbon monoxide detectors.
- Practice: Once your system is installed and inspected, practice your startup and shutdown procedure with your generator a few times a year. This ensures you're familiar with the steps when an actual outage occurs.
By following these guidelines, you can ensure that your portable generator serves as a reliable and safe source of emergency power, keeping your home running smoothly when the grid goes dark.